|
|
The Edit Product Mix dialog box |
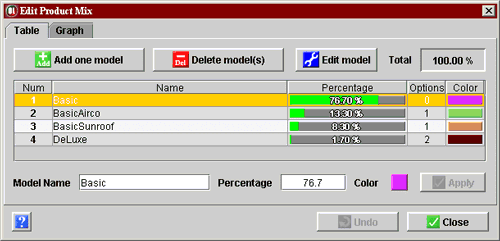 |
Product models are defined in the dialog on the left, accessible via the "Edit Mix/Model" option in the "Variants" menu. The Table tab of the dialog allows you to edit the models. The Graph tab shows a pie chart of percentages of currently defined models. When models are defined and operations assigned to workstations, the detailed behavior of the line can be shown in the Line Model Summary window. |
|
To edit an existing model, select the corresponding line in the table and go to the second bulet below. To define a new model,
|
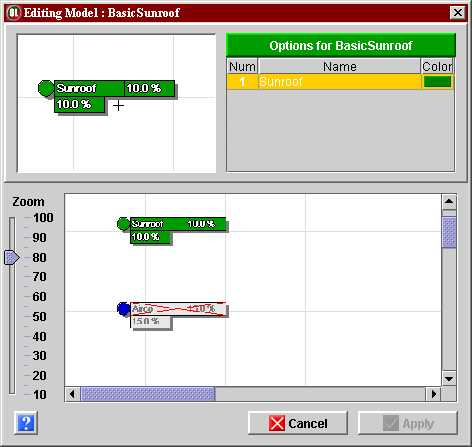 |
The lower part of the dialog window shows the BOM diagram where each option should be represented by a node. The ruler on the left of the diagram allows you to zoom out, so that more of the diagram be visible. The upper right part of the dialog window shows the table of options the model is currently featuring (this table is empty for a new model). The upper left part is a "magnifying glass" that shows the detail of the BOM diagram below: when you move the mouse cursor in the diagram below, the magnifier shows the spot below the cursor in the original size. This allows you to easily read the BOM diagram even with a high zoom-out. To add/remove an option to/from the model, simply click the corresponding node in the BOM diagram. Adding an option will color the BOM node, like the "Sunroof" node in the figure on the left. Removing an option will gray and strike out the BOM node, like the "Airco" node in the figure on the left. The table of options is updated accordingly. When you are finished specifying the list of options on the model, click the Apply button to close the dialog. |