|
|
How do I save images on a Macintosh ? |
|
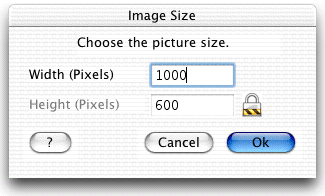
Selecting the Save Image Area option on a Macintosh will brings up the following dialog box if the image is resizable: |
 Save Image Parameters dialog on Macintosh |
|
The "Width" and "Height" fields set the size of the saved image. In some cases, such as when saving the contents of the 3D cube, the Height field is disabled and marked with a lock. This is because in those cases the height of the image must equal its width or that the height is camputed to respect the aspect ratio of the area. Accordingly, changing the Width sets the Height to the same value. After clicking on the "Ok" button, the following box brings up, letting you choose the image compression settings.
There are several file type accessible via the main pop up. The right area of the window previews the image with the chosen compression parameters (to zoom in and out the preview, click on it while holding Alt or Alt+Shift keys). The two most interesting format are :
The "Ok" button proceeds with the save, prompting you to specify the file to save the image to. The "Cancel" button cancels the save. |