|
Some GeneSpring versions contain
a glitch in the External Program Interface that causes ArrayMiner to receive
the data with columns in the wrong order, or to receive more columns than
are defined by GeneSpring's Experiment Interpretation (please refer to
GeneSpring documentation). This is however very easily corrected by following
the procedure below.
|
In GeneSpring
|
|
In ArrayMiner
|
| 1 Run ArrayMiner using the
External Program Interface |
|
|
|
|
|
|
|
|
|
2 Verify the column order by
reviewing the "Attribute" column in the Raw
Data window |
| |
|
3 Switch back to the running
GeneSpring |
| |
|
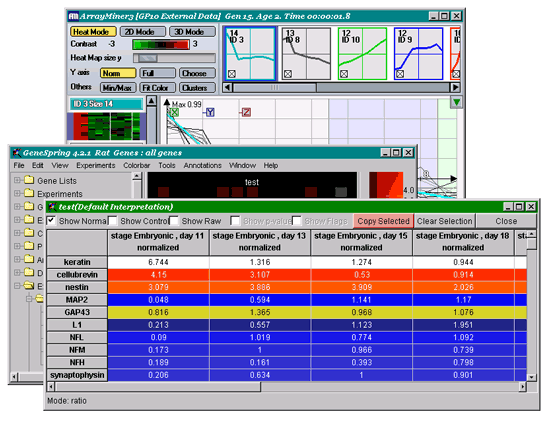
|
| 4 Invoke the spreadsheet view
of your data by selecting "View / View as Spreadsheet"
option in GeneSpring's main menu. Check the "Show normalized"
checkbox only, select the first row in the spreadsheet
by clicking the name of the first gene in the table, and click the
"Copy Selected" button (as shown in the figure
below). This copies the column order into your machine's Clipboard.You
may now close the spreadsheet window in GeneSpring. |
|
|
|
|
|
|
| |
|
5 Get back to the running ArrayMiner,
and select the "Tools / Get GeneSpring data order from Clipboard"
option in the main menu. Click "Yes" in the message box
"Paste GeneSpring columns from Clipboard." |
|